Summer break will be coming to an end soon so it's time to gear up for Back To School. Are you ready? We have a fun little free project for you to try. Today we're making a pencil case that we're sharing with you to give you a head start on getting you or your little ones ready for Back To School. "Wanna see it? Here it goes...."
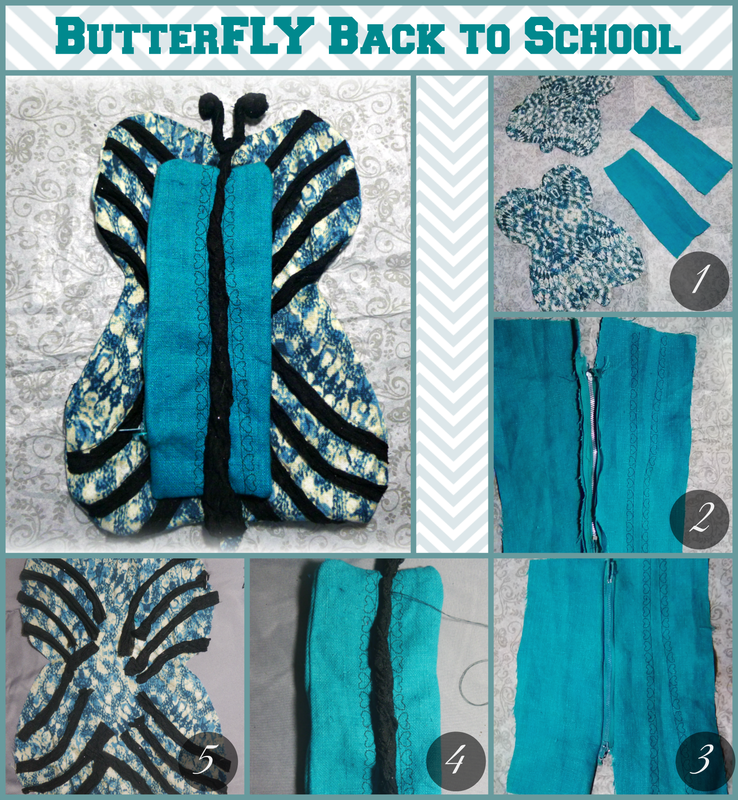
First we selected a nice, sturdy fabric. The one we used is 100% peasant linen. We chose a second fabric that was less sturdy but had a cute pattern that matched the color of the peasant linen.
Next, we added decorative stitching to the rectangular pieces, but before adding this decorative stitching, we marked lines for the center of the butterfly to use as a guide for the stitching.
We then sewed the zipper to the long side of the rectangular pieces, and sewed all around the rectangle.
Then we turned it (the pouch) inside out and set it aside.
We drew decorative lines on the butterfly shape and top stitched on top of those lines.
We cut strips 5" X 3/4" and sewed them onto the top stitching we did in the previous step.
We cut a strip of fabric long enough to go down the entire middle of the butterfly and twisted it to form a long piece of rolled fabric. We hand sewed it onto the top/middle of the pouch. Then we hand sewed and secured the pouch onto the butterfly.
We placed the 2 butterfly pieces right sides together and sewed around using a 1/4" seam allowance, and left an opening for turning at the top.
We turned the butterfly inside out and hand sewed the opening closed.
Finally, as an optional step, we used a pipe cleaner to form the shape of antennae and hand sewed it to the butterfly.
Because we were strapped for resources, we weren't able to get as creative as we would have liked. So if you plan on making one, let your creative juices flow. Your little ones will love heading Back To School with their butterfly pencil pouch in tow.


 RSS Feed