|
If you're like us, keeping your sewing room neat and tidy can be a bit of a challenge. It's frustrating when you can't find things while working on a project because things are out of place. So for this week's Video Of The Week, we've been researching different tips, tricks, and tutorials on sewing room organization. We came across this YouTube video that you might enjoy if you're looking for organization ideas. We put one of the methods to use, using scrap fabric and glue to cover an ugly cardboard box for use as a storage container. What we love about this tip is that it's quite an inexpensive way to organize while adding to the decor of your sewing room! Aside from the video below, here is a list of other links on sewing room organization you may find useful: https://www.youtube.com/watch?v=GorBAza_cws https://www.youtube.com/watch?v=AtMfrSUxVYQ https://www.youtube.com/watch?v=kA3qSRn8buM http://bit.ly/1TDafCW  Following up on our post on The Pink Ribbon Place, I recently went to a workshop that took place there titled "Look Good Feel Better." If you missed that post, be sure to go back and check it out. They provide lots of resources for women with breast cancer.
Today we found a video that displays a collection of sewing supply/sewing room organization ideas. Let's face it, one of the hardest things to do when working on a project is to keep your sewing tools, supplies, and notions neat and tidy. After watching this video, we came away with lots of inspiration and motivation to organize our sewing room. We hope you'll do the same and be motivated enough to actually get up and do something about it. If so, we'd love to hear your plans in the comments. Or if you have any tips to share we hope you'll share those in the comment section too!  Tis the season to be jolly. But what do you do if you don't have the money to buy expensive gifts and decorations to get your home ready for Christmas? We're creating a crochet Angel Tree Topper! The only materials needed are yarn, crochet hook, poly-fill, and an optional electric candle or Christmas light. Not only that, but it shouldn't take too much time to make either, so you're saving time, AND money.
 Progress is going slowly but surely on our Raggedy Ann doll. Today's adventure with Raggedy Ann has been quite frustrating. What happened you ask? Well, long story short, we didn't read the instructions on the pattern. So...when cutting the fabric for the dress bodice, we didn't cut it on the fold. So if you're making this pattern, be sure to cut the dress pattern on the fold!
 We've completed the body portion of our Raggedy Ann doll and we're in the middle of putting the finishing touches by sewing on the hair. We sewed the legs onto the body and voila! We're fairly satisfied with the outcome.
Have you lost weight and need a new dress form? We found a great video on YouTube to share with you that demonstrates how to pad your dress form to make it a larger size. From watching the video, all you need are shoulder pads a dress form, and pins. Don't have shoulder pads? We're going to try using poly fill instead. We'll share that with you in a later video so stay tuned. But for now, sit back and watch the video and let Nick Verreos show you how to do it. He also mentioned a book he has on Amazon. The price is pretty inexpensive and we hope to check it out soon. You can find it on Amazon. Let us know how your dress form turns out if you decide to try it out.  Our adventures with Raggedy Ann and Andy continue. Today we made the legs and feet. Did we run into any issues today? Of course! First off, somehow we lost pattern piece 4 for the upper leg. To compensate, we simply used the lower leg pattern piece 5 for both the upper and lower leg. This will probably make the doll a bit taller than called for but we are willing to live with it in order to limit wasted time and frustration. Then, after cutting out all of the needed pattern pieces, we realized we forgot to change fabrics to distinguish the shoes from the rest of the body.
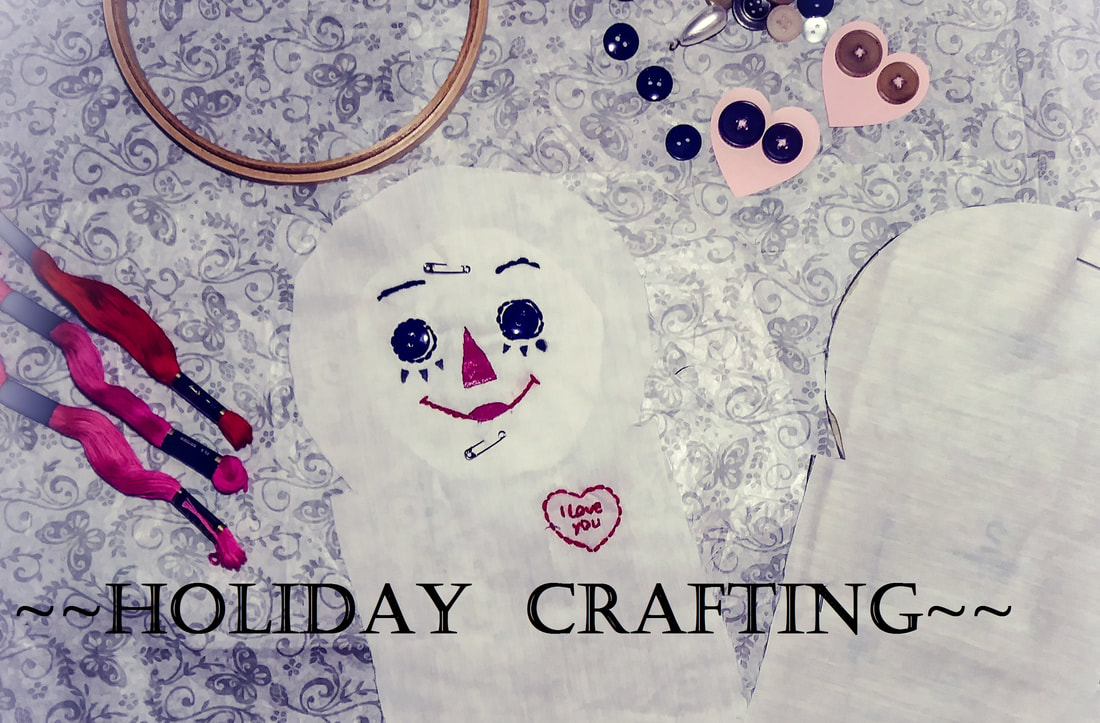 Our adventures with Raggedy Ann and Andy continue. Our Raggedy Ann doll is coming along quite smoothly, with a few hiccups here and there. The upper torso is complete. Only a few more steps and she'll be done. We'll share with you a few of the issues we ran into and a few tips we figured out along the way.
|
Follow Us On Social

Archives
February 2018
Categories
All
Grab My Button!
Things We Love
   |
 RSS Feed

